
Sommaire
Storing email data on Microsoft Office 365 is a much safer option than simply keeping it in PST files on local drives. The PST file data, when stored in Office 365, is less vulnerable to corruption and is more easy to access from multiple devices. Meeting compliance mandates is also easier due to the retention, auditing and discovery features of Office 365.
Uploading PST files to Exchange Online using Microsoft Azure Storage
The Office 365 Import Service from Microsoft makes it easier for organizations to move PST files in bulk (both primary and archive) to Office 365 from their network shares. This method, knows as the network upload method, involves the following steps:
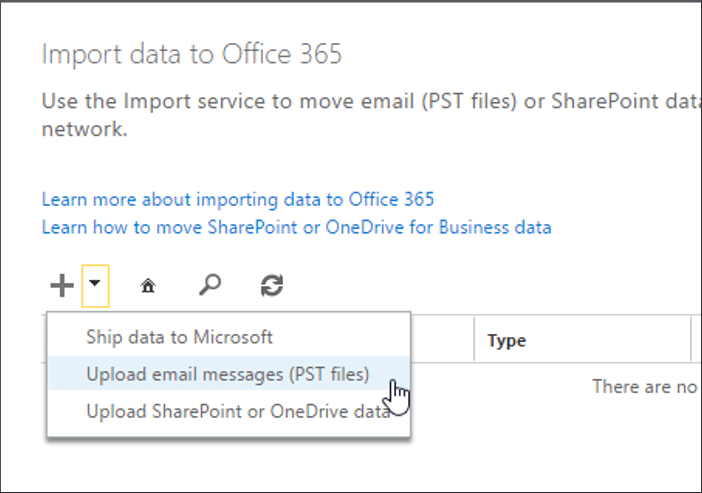
- In the Office 365 Admin center, expand Users, select Data migration and click Upload PST files. Import data to Office 365 page appears.

2. Expand the plus (+) sign, and select Upload email messages (PST files). Upload files over the network page appears.
3. Click the link Show network upload SAS URL. Now, the SAS URL appears.
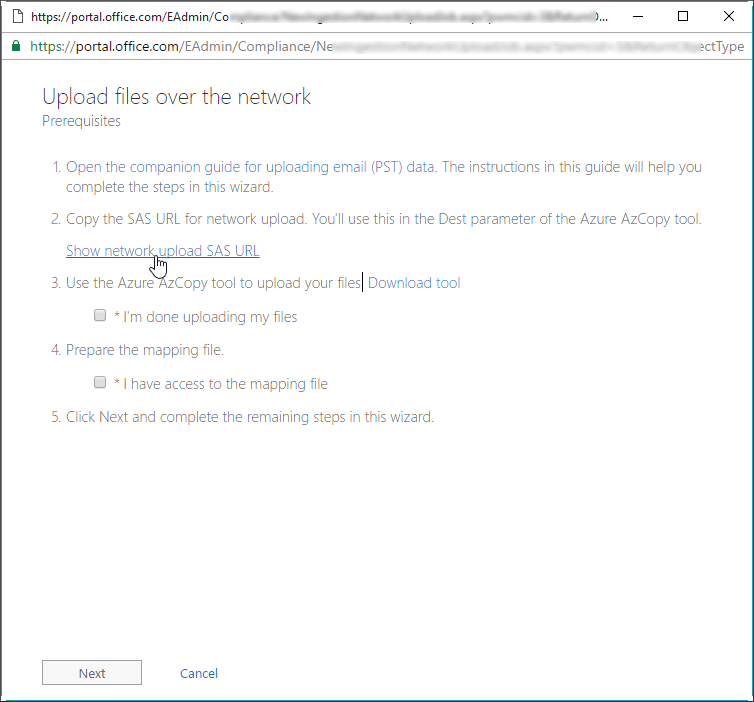
Note: For the Microsoft documentation on PST migration procedure, click the first link Open the companion guide for uploading email (PST) data.
4. Now, copy the SAS URL. Keep it saved somewhere for future use (in Step 7).

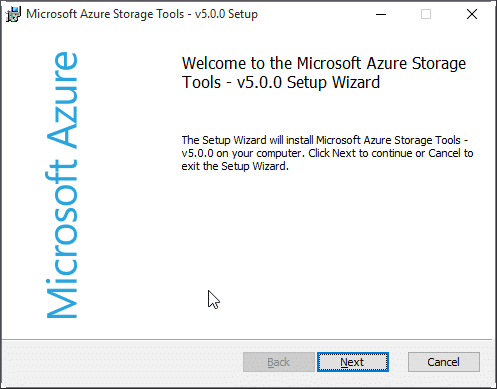
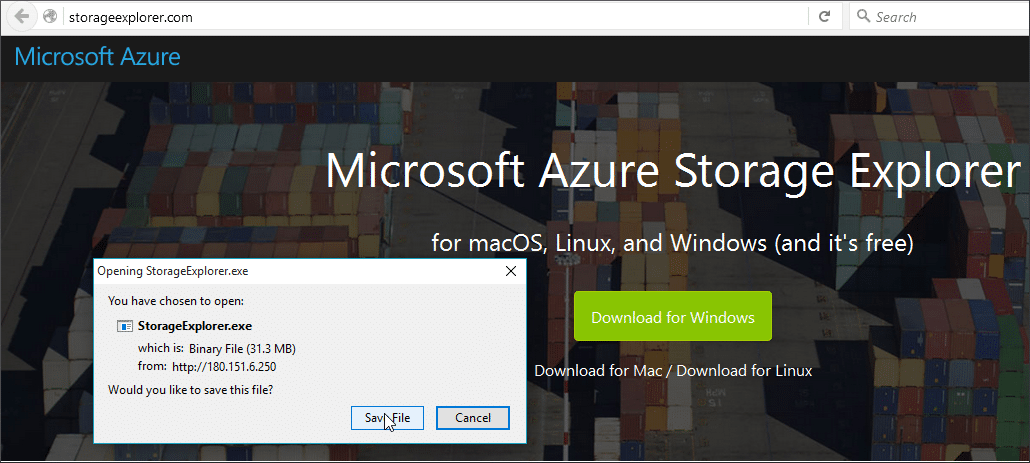
5. Click Download tool. Click the installer when the download is complete. The Welcome window of the Microsoft Azure Storage Tools appears. Complete the installation.

6. Click Next and complete the installation.
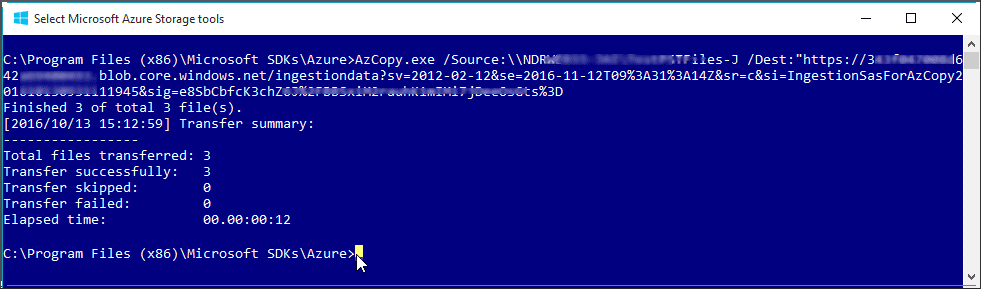
7. In the Azure command line tool, execute the cmdlets in the syntax (to upload PST files to Azure Storage location):
AzCopy.exe /Source:<Location of PST files> /Dest:<SAS URL> /V:<Log file location>
Note 1: Now you can open the Microsoft Azure Storage Explorer tool, connect to it, and provide the SAS URL to preview the PST files.
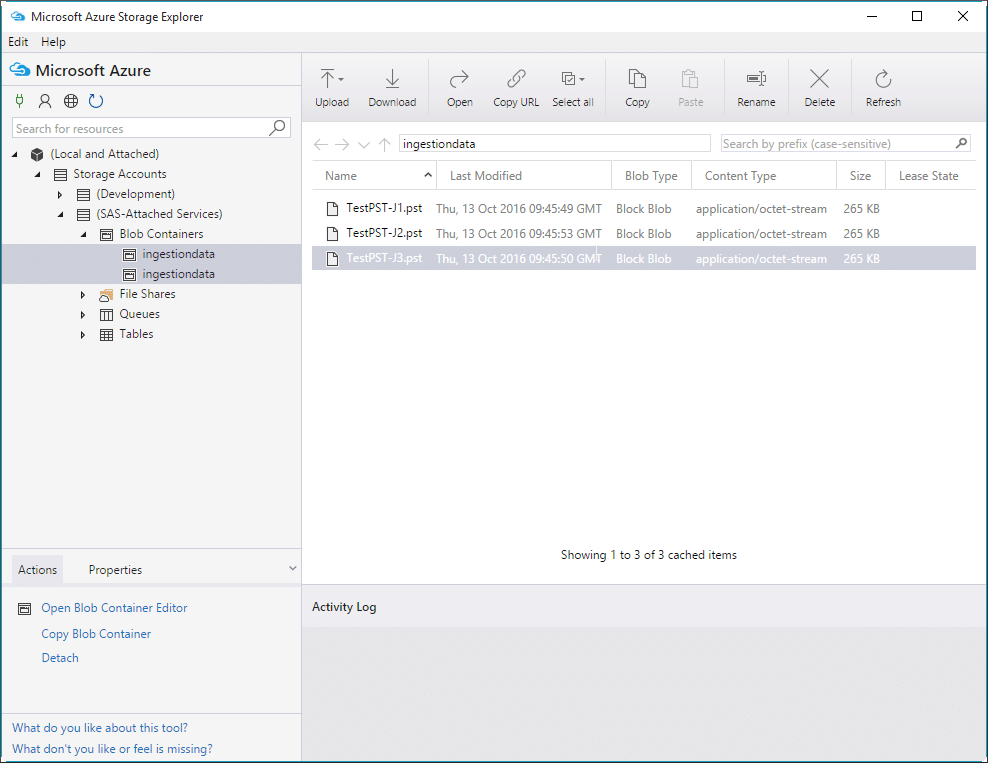
Note 2: You can download and install the Microsoft Azure Storage Explorer tool from Microsoft.
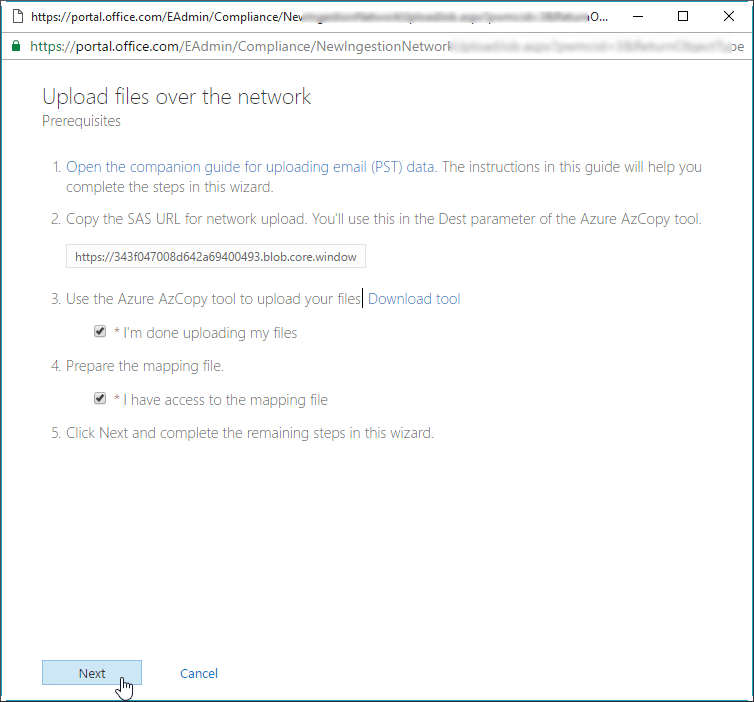
8. After successful upload, check the ‘I’m done uploading my files’ checkbox in the Upload files over the network Now to create a CSV file for mapping PST files, and check the checkbox
‘I have access to the mapping file’. Finally, click Next.
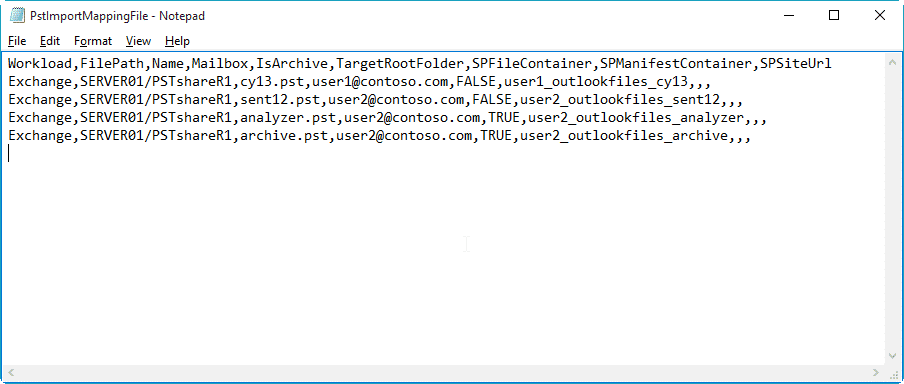
Note: To create a CSV file, use the format recommended by Microsoft. Provide values for Workload, FilePath, Name, Mailbox, IsArchive, TargetRootFolder, ContentCodePage, SPFileContainer, SPManifestContainer, and SPSiteUrl separated by commas as shown. You can use Excel or Notepad for editing the CSV file.
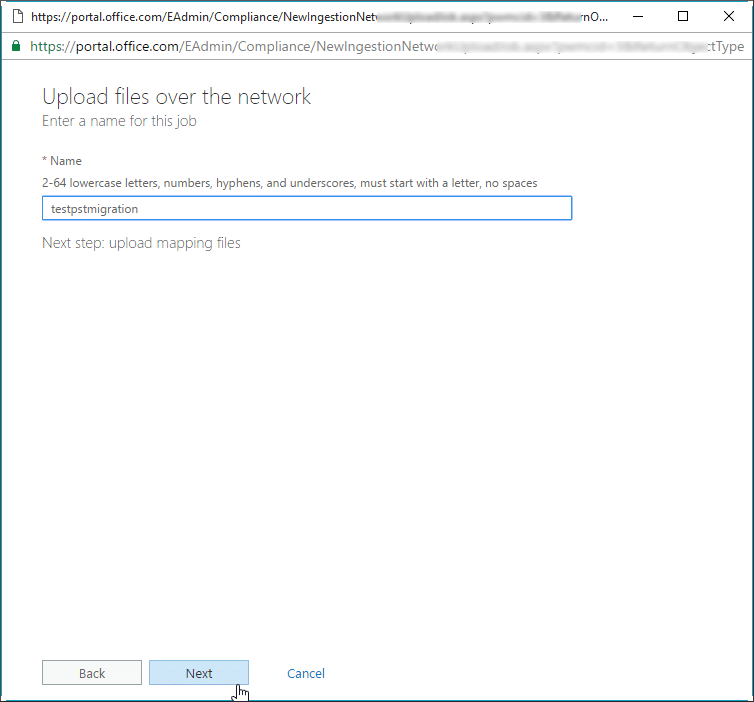
9. Enter a name for the job. Click Next.
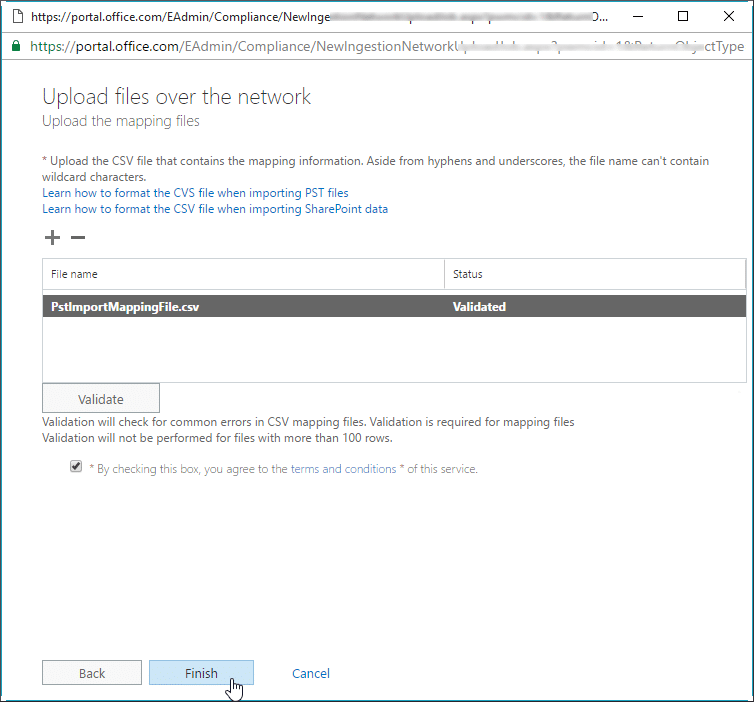
10. Click the plus (+) sign, upload the CSV file and validate it; click Finish and close the widow.
11. Now, the Import data to Office 365 page (refer to Step 1 and Step 2) displays the status of the import process.
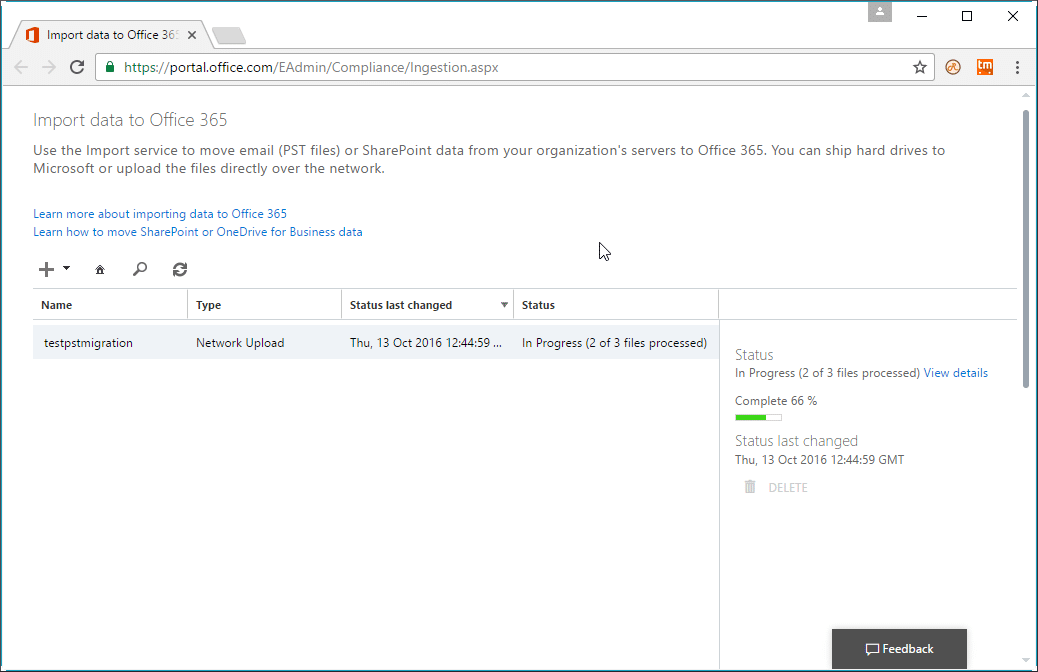
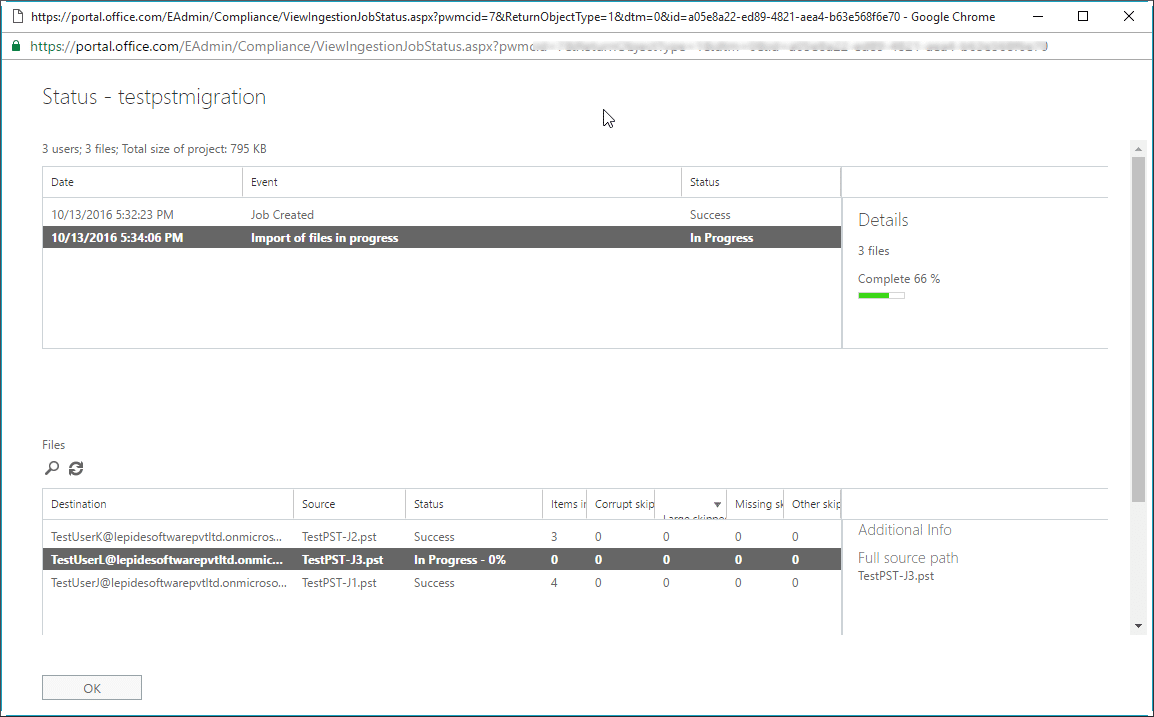
Note: Click View Details to get detailed information.
Using Lepide Exchange Recovery Manager to export PST files to Office 365
Lepide Exchange Recovery Manager enables users to copy data from the source PST file and paste it to the Office 365 destination directly. The steps for this process are given below:
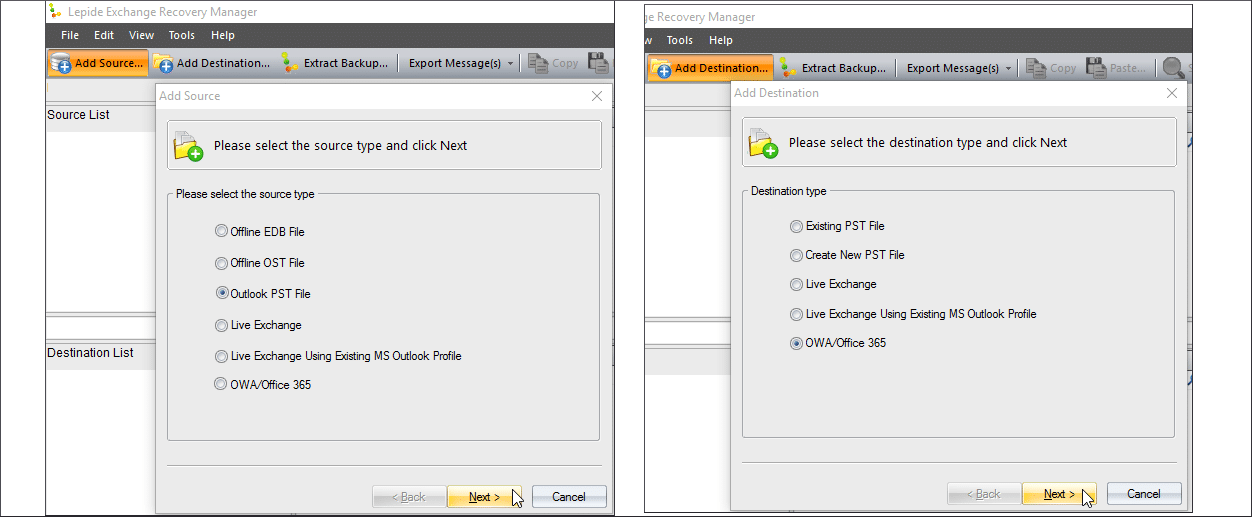
1. In LERM, add the PST file as the source and then add Office 365 as the destination.
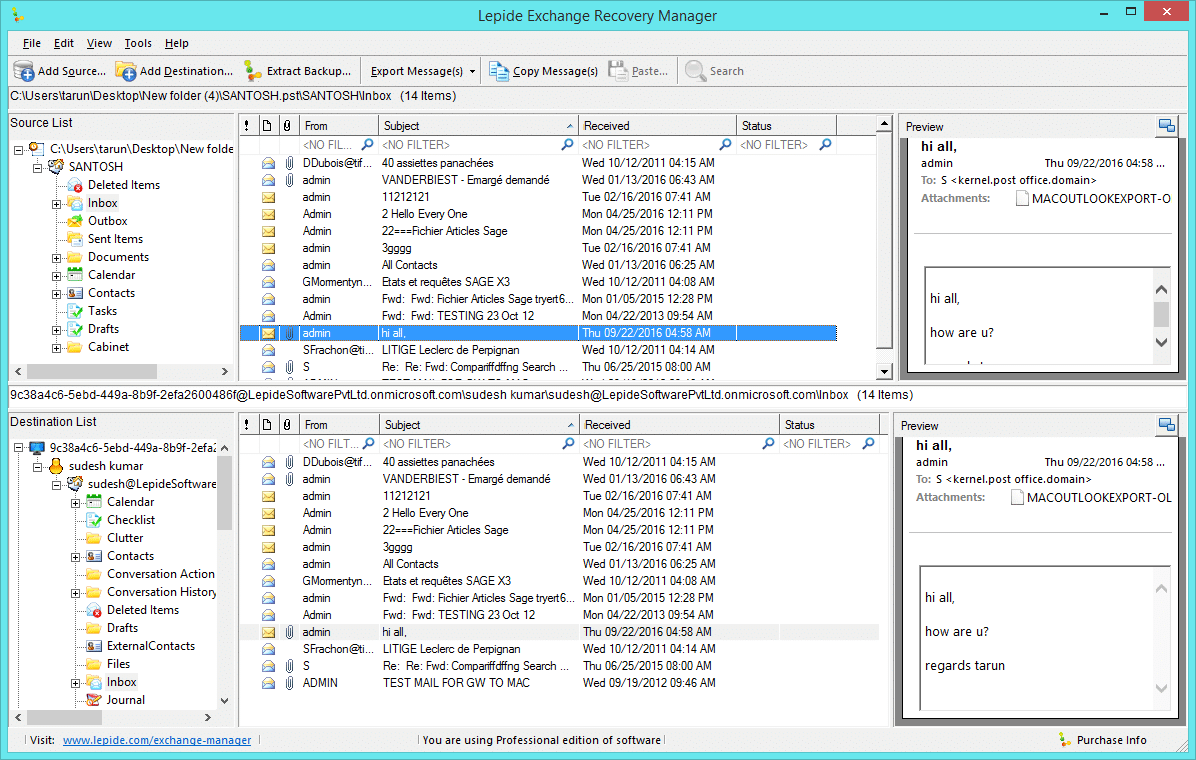
2. Copy the mailbox or its items from the PST file and paste to Office 365. The screenshot shows a folder from the PST (source) file copied to the Office 365 mailbox (destination).
Note: Lepide Exchange Recovery Manager also helps you export mailboxes from Exchange/Office 365 to PST files and import PST files in Exchange/Office 365.
Exchange administrators have several options when it comes to importing PST files from a network share to Exchange Online; the network upload method or third-party solutions to name a few. The network upload method, while relatively simple, involves numerous steps and can be a time-consuming process for those unfamiliar with it. Lepide Exchange Recovery Manger speeds us and simplifies the process by allowing you to export PST files directly to Office 365 with a simple cut and paste.
Article proposed by Lepide Software


Here is another tool which is MailsDaddy PST to Office 365 Migration Tool. With this application, you can export Multiple PST file data like emails, calendars, contacts, appointments, and attachments etc into Office 365 Exchange Online Mailbox.